
How to Use an Air Fryer?
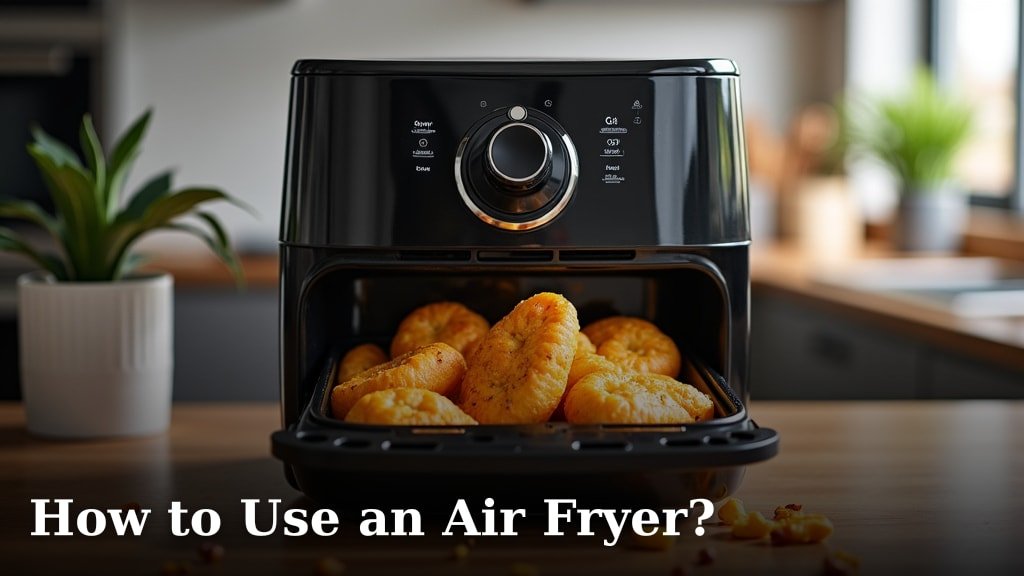
To use an air fryer, you simply place your food in the basket, set the time and temperature, and let the machine work its magic. We found this kitchen appliance uses hot circulating air to cook food, giving it a crispy texture without a lot of oil.
You can cook a wide variety of foods, from frozen french fries to fresh vegetables and meats. Many people love how an air fryer helps them create healthier versions of their favorite fried dishes with less fat and fewer calories. It’s a great tool for quick meals and easy cleanup too.
- Place food in the air fryer basket.
- Set the correct temperature and time.
- Close the basket and start cooking.
- Shake or flip food halfway for even cooking.
- Enjoy your perfectly crispy meal.
Are you ready to discover the ease and benefits of this popular gadget? Let’s walk through exactly how to use an air fryer to achieve delicious results every time.
Getting Started with Your Air Fryer
Diving into air frying is exciting! Before you cook your first delicious meal, let’s get acquainted with your machine. Understanding the basic parts and functions will make your cooking experience much smoother.
Understanding Your Air Fryer’s Components
Most air fryers share a similar design, even if they look a little different on the outside. Knowing what each part does helps you use it correctly and safely.
- Outer Shell: This is the main body of the appliance. It houses all the internal components and protects you from the heating element.
- Heating Element: Usually located at the top inside, this is what generates the intense heat needed for cooking. Think of it like a mini oven element.
- Powerful Fan: This fan is the real star! It circulates that hot air at high speed, creating the “fry” effect. This is key to getting that wonderful crispy texture.
- Cooking Basket/Drawer: This pull-out compartment holds your food. It often has holes or a grate at the bottom to allow air to circulate all around your ingredients.
- Collection Tray: Located under the cooking basket, this catches any drips or excess oil. It helps keep your appliance clean.
- Control Panel: This is where you set the temperature and time. Some have manual dials, while others feature digital displays with preset functions.
Preparing for First Use
Just like any new appliance, a little preparation goes a long way. This initial setup ensures there are no manufacturing residues and everything is ready for safe use.
- Unpack Carefully: Remove all packing materials, including any tape or cardboard inserts.
- Read the Manual: Seriously, take a few minutes. Your specific model might have unique features or instructions. We found that scanning the safety section is always a good idea.
- Clean Before First Use: Wash the basket and collection tray with warm, soapy water. Wipe the inside and outside of the main unit with a damp cloth. Let everything dry completely.
- Perform a “Burn-Off” Cook: Many manufacturers recommend running the air fryer empty for 10-15 minutes at a high temperature (around 400°F or 200°C). This helps burn off any factory smells. You might notice a slight plastic smell the first time, but it should dissipate. Ensure good ventilation during this step.
The Air Frying Process: A Step-by-Step Guide
Ready to cook? Awesome! Air frying is straightforward once you get the hang of it. We’ll walk you through each step, from choosing your food to serving your delicious creation.
Step 1: Preparing Your Food
Proper food preparation is essential for the best air frying results. This isn’t just about cooking; it’s about making sure your food cooks evenly and gets perfectly crispy.
Choosing the Right Ingredients
Almost anything you’d bake, roast, or pan-fry can be air-fried. Think beyond just french fries! We found that everything from vegetables to chicken wings and even some baked goods work wonderfully.
Prepping Your Food for the Basket
- Pat Dry: For crispy results, especially with things like chicken skin or potatoes, pat your food thoroughly dry with paper towels. Excess moisture can steam your food instead of air frying it.
- Cut Evenly: Ensure pieces are similar in size. This helps them cook at the same rate. Uneven pieces mean some might burn while others are still raw.
- Lightly Oil: While air fryers use less oil, a tiny bit of oil (about a teaspoon or two) helps with browning and crispiness. You can toss food with oil or use an oil spray. We found that cooking spray can sometimes damage non-stick coatings, so check your manual or use a reusable oil mister instead.
- Season Generously: Don’t forget your favorite herbs and spices! Air frying can really make those flavors pop.
Step 2: Preheating Your Air Fryer
Should you preheat? Absolutely! Just like a traditional oven, preheating your air fryer ensures a consistent cooking temperature from the moment your food goes in. This leads to more even cooking and better texture.
- Check Recipe: Most recipes will specify whether to preheat and for how long.
- General Rule: If not specified, preheat for 3-5 minutes at the desired cooking temperature.
Step 3: Loading the Air Fryer Basket
This is where you want to be mindful of space. Don’t overcrowd the basket!
- Single Layer is Best: For maximum crispiness, arrange food in a single layer. Overlapping food obstructs airflow, leading to uneven cooking and soggy spots.
- Avoid Overfilling: If you have a lot of food, cook in batches. Patience here pays off in crispier results.
- Use Accessories: Some air fryers come with racks or skewers. These can help maximize space and even cook different items simultaneously.
Step 4: Setting Time and Temperature
This part is straightforward, but accuracy matters. We found that getting the right settings is key to success.
Temperature Guidelines
Most air-fried dishes cook between 325°F and 400°F (160°C – 200°C). Frozen foods often benefit from higher temperatures to achieve a crispy exterior before the inside overcooks.
Time Guidelines
Cooking times are generally shorter than traditional ovens. A good rule of thumb is to start with about 20-30% less time than a conventional oven recipe recommends. Always check your food for doneness.
Many recipes provide specific air fryer times and temperatures. When in doubt, start with a lower time and check frequently.
Step 5: Shaking, Flipping, or Tossing
This is a critical step for even cooking and browning. Remember that powerful fan? It’s great, but it primarily cooks from the top. You need to give your food a little help.
- Shake: For smaller items like fries or tater tots, simply pull out the basket and give it a good shake halfway through the cooking time.
- Flip: For larger items like chicken thighs or burgers, use tongs to flip them over.
- Toss: For vegetables, tossing them with tongs or a spatula ensures all sides get exposed to the hot air.
This simple action prevents one side from browning too much while the other remains pale. We found that doing this ensures that desirable “all-around crispy” texture.
Step 6: Checking for Doneness and Serving
Your almost there! How do you know its done?
- Visual Cues: Look for golden brown color and a crispy exterior.
- Internal Temperature: For meats like chicken, always use a meat thermometer to ensure they reach a safe internal temperature (e.g., 165°F or 74°C for poultry).
- Taste Test: For vegetables or non-meat items, a quick taste test can confirm desired tenderness and crispness.
Carefully remove your hot food using tongs or by gently pouring it out. Be careful of hot air escaping when you open the basket.
Tips for Air Frying Success
Becoming an air frying pro takes a little practice. These extra tips will help you consistently achieve fantastic results and make the most of your appliance.
Essential Accessories You Might Want
While not strictly necessary, some accessories can enhance your air frying experience significantly.
- Oil Mister: A reusable mister allows you to lightly coat food evenly without aerosol propellants.
- Silicone Tongs: Protect your non-stick basket from scratches.
- Parchment Paper Inserts: These perforated liners help with cleanup and prevent smaller items from falling through the basket. Just ensure they are food-safe and appropriately sized.
- Small Ramekins or Muffin Cups: Great for baking small items or heating dips.
Common Air Frying Challenges and Solutions
Encountering an issue? You’re not alone. Here are some common problems and how to fix them.
| Problem | Causes | Solution |
|---|---|---|
| Food isn’t crispy | Overcrowding, too much moisture, not enough oil. | Cook in batches, pat food dry, add a light oil spray. |
| Food is dry or tough | Overcooking. | Reduce cooking time, lower temperature, check frequently. |
| Uneven cooking/browning | Not shaking/flipping, overcrowding. | Shake or flip food halfway through, don’t overcrowd the basket. |
| Food sticking to basket | Not enough oil, worn non-stick coating. | Lightly oil food and/or basket, use parchment paper liners. |
Cleanup After Air Frying
One of the best parts about air frying is the easy cleanup! We found that cleaning immediately after use prevents food from caking on and makes the process a breeze.
- Unplug: Always unplug your air fryer and let it cool completely before cleaning.
- Wash Basket and Tray: Remove the basket and collection tray. Most are dishwasher safe, but handwashing with warm, soapy water is gentle and effective.
- Wipe Down: Use a damp cloth to wipe the inside and outside of the main unit. Avoid abrasive cleaners.
- Clean Heating Element: If you notice residue on the heating element, gently wipe it with a damp cloth once it’s completely cold. Some stubborn residue might need a soft brush.
Ready to Air Fry? Start Here!
Your air fryer is a versatile tool for creating delicious, healthier meals. We found that with a little practice, you’ll be air frying like a pro in no time.
Here’s a quick checklist to make sure you’re ready to go:
- Have you read your air fryer’s manual?
- Are the basket and tray clean and dry?
- Is your food prepped and lightly oiled?
- Do you have your desired cooking time and temperature in mind?
- Are you ready to shake or flip your food halfway?
- Is there a spot nearby for safe cooling after cooking?
Enjoy exploring a world of crispy possibilities!
Conclusion
You’ve now got all the knowledge to conquer your kitchen with an air fryer. We found that cooking with hot circulating air gives you amazingly crispy food with less oil, making your favorite dishes a little healthier.
Remember to prepare your food properly, preheat your machine, and shake or flip for even cooking. With a bit of practice, you’ll easily create delicious meals.
So, pull out your air fryer, pick a simple recipe, and start cooking! Happy air frying!
Frequently Asked Questions
Can I put aluminum foil or parchment paper in an air fryer?
Yes, you can use aluminum foil or parchment paper in an air fryer, but with some precautions. Always place it under your food and ensure it doesn’t block air circulation. Never preheat an empty air fryer with foil or parchment, as it could fly up and touch the heating element, posing a fire risk.
Do air fryers use a lot of electricity?
Air fryers typically use less electricity than traditional ovens because they cook faster and are smaller. We found that most models range from 1200 to 1800 watts, similar to a microwave. This makes them a more energy-efficient option for many everyday cooking tasks.
How do I know what temperature and time to use for different foods?
Start by checking your specific recipe, as many now include air fryer instructions. As a general guideline, reduce conventional oven temperatures by about 25°F and cooking times by 20-30%. Always check for doneness visually and with a meat thermometer for proteins.
Can I cook frozen foods in an air fryer?
Absolutely! Air fryers excel at cooking frozen foods like fries, chicken nuggets, and fish sticks, giving them a fantastic crispy texture. We found that many frozen food packages now have specific air fryer instructions, making it even easier for you.
Why does my air fryer smell like plastic or burning?
A new air fryer might have a slight plastic smell during its first few uses; this is usually the “burn-off” process and should dissipate. If it continues or smells like burning, unplug it immediately. Check for food debris caught in the heating element or excessive grease build-up, and ensure all parts are clean before the next use.
