How To Toast Bread In An Air Fryer?
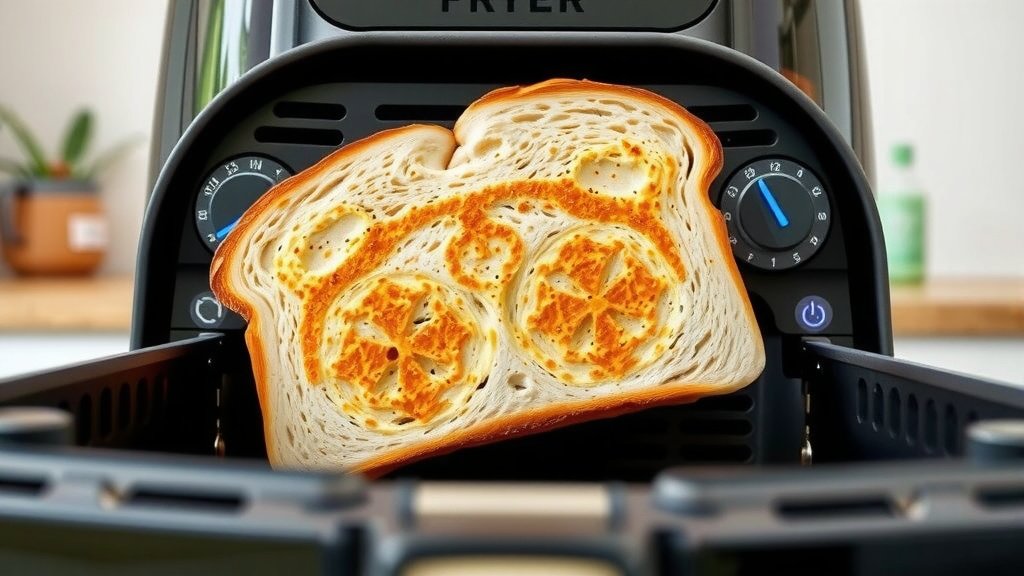
To toast bread in an air fryer, preheat your appliance to 350-375°F (175-190°C) for just 2-3 minutes, then lay bread slices in a single layer inside the basket.
Air fry your bread for a quick 3-5 minutes, ensuring you flip it halfway through, to achieve the perfect golden-brown crispness for delicious air fryer toast.
- An air fryer provides a fast and even way to make deliciously crispy toast.
- Always preheat your air fryer; around 350-375°F is a good starting point.
- Lay bread slices in a single layer to let the hot air circulate properly for uniform toasting.
- Most toast needs 3-5 minutes, with a flip, but watch it closely as air fryers vary.
- Experiment a little with time and temperature to find your ideal toast, especially with different bread types.
How To Toast Bread In An Air Fryer?
Toasting bread in an air fryer is surprisingly simple and results in a wonderfully crisp piece of toast, often quicker and with less fuss than a traditional oven. You just need to arrange your bread in the basket, set the right temperature, and let the circulating hot air do its magic for a few minutes.
Why Toast Bread in an Air Fryer? It’s a Game-Changer!
Have you ever thought about making toast without a toaster? It sounds a little wild, right? Well, I found that an air fryer can actually be a fantastic alternative, especially if you’re short on counter space or your toaster is on the fritz. It uses circulating hot air to cook food, which is perfect for crisping bread.
Many people, myself included, enjoy the air fryer because it offers a consistent and even crispness that some traditional toasters struggle with. It’s also incredibly versatile, meaning you can whip up other breakfast items right alongside your toast.
Plus, you get to skip the traditional toaster oven’s long preheat time. From what I’ve read, the smaller chamber of an air fryer means it heats up fast, giving you toast on demand. It truly offers a convenient and efficient way to get your morning crunch.
Gathering Your Toasting Tools
Making toast in your air fryer requires very little equipment, which is part of its appeal. You just need your air fryer, of course, and your favorite bread. Sometimes, a pair of tongs helps with flipping, but your fingers can do the job once the toast cools slightly. No fancy gadgets needed for this simple task!
What Kind of Bread Works Best?
Almost any bread works well in an air fryer! From what I’ve researched, common choices like white sandwich bread, wheat bread, sourdough, and even bagels toast beautifully. Thicker slices might take a minute or two longer, but the principle remains the same. You want something sturdy enough to hold its shape but porous enough to crisp.
I’ve found online that even artisan breads or those with added seeds toast up nicely, developing a deliciously crunchy exterior. Just remember that thinner slices will toast much faster than thick-cut artisanal bread.
The Step-by-Step Guide to Air Fryer Toast Perfection
Let’s walk through the process together. It’s super straightforward, and you’ll be enjoying crispy toast in no time. Think of it like a conversation with your air fryer; you tell it what to do, and it delivers.
Step 1: Preheat Your Air Fryer
Many experts say preheating is key for even cooking, and toasting is no exception. I always recommend preheating your air fryer to 350-375°F (175-190°C) for about 2-3 minutes. This ensures the basket is already hot when the bread goes in, leading to instant crisping.
Skipping this step might lead to toast that’s a little drier and less evenly browned, as the bread sits there waiting for the air fryer to heat up. A quick preheat makes all the difference for consistent results.
Step 2: Prepare Your Bread
This step is probably the easiest! Simply take your bread slices out of the bag. You don’t need to add oil or butter at this stage unless you’re making a specific kind of savory toast. We’re aiming for plain toast first.
If you’re using very large slices, you might need to cut them in half to fit in your air fryer basket without overlapping. Remember, no overcrowding is crucial for good air circulation and even toasting.
Step 3: Load the Basket Carefully
Place your bread slices in a single layer in the air fryer basket. This is perhaps the most important rule for air frying anything, especially toast! Hot air needs to circulate completely around each piece to crisp it evenly. If you stack them, you’ll get soggy, half-cooked bread.
Depending on your air fryer size, you might only be able to toast 2-4 slices at a time. That’s perfectly fine! Just work in batches if you need more. From what I’ve seen, patience with batches pays off for superior toast quality.
Step 4: Set the Time and Temperature
Once your bread is nestled in the basket, it’s time to set the controls. For most standard bread, I’ve found that 350-375°F (175-190°C) for 3-5 minutes is the sweet spot. The exact temperature and time depend on your air fryer model and how dark you like your toast.
Start with the lower end of the time range (say, 3 minutes) and check it. You can always add more time, but you can’t unt-toast burnt bread! It’s all about finding your personal preference.
Step 5: Flip for Even Browning
Halfway through the cooking time, I highly recommend flipping your bread slices. For example, if you’re toasting for 4 minutes, flip after 2 minutes. This ensures that both sides get equal exposure to the circulating hot air, resulting in beautifully even browning.
Some air fryers might cook more evenly than others, but a quick flip is a simple step to guarantee uniform crispness. It’s like turning your steak on the grill; it just helps everything cook better.
Step 6: Check and Adjust
Once the timer goes off, carefully open your air fryer basket and check your toast. Is it golden brown and crisp to your liking? If it needs a little more, put it back in for another minute or so. Always trust your eyes here; a slightly lighter toast might just need a touch more time.
Finding the Perfect Air Fryer Toast Settings
Getting the ideal toast means understanding that every air fryer is a little different, and so is every type of bread. Consider this a helpful guide to get you started, but feel free to adjust based on your own experience.
| Bread Type | Temperature | Time (Approx.) | Notes |
|---|---|---|---|
| Standard White/Wheat | 350°F (175°C) | 3-4 minutes | Flip halfway for even color. |
| Sourdough/Thick-cut | 375°F (190°C) | 4-6 minutes | May need slightly longer, check often. |
| Bagels/English Muffins | 325°F (160°C) | 3-5 minutes | Toast cut-side up first, then flip if desired. |
| Rye/Pumpernickel | 350°F (175°C) | 3-5 minutes | Dense breads, watch for crispness. |
Tips for Consistently Great Toast
Achieving perfect toast every time is a mix of technique and observation. Here are a few things I’ve learned that really help.
- Don’t Overcrowd: This is non-negotiable. If you stack bread, it won’t toast properly. Give each slice its own space.
- Preheat Always: A hot air fryer ensures the bread starts crisping immediately, leading to better texture.
- Watch It Closely: Air fryers can toast quickly. Keep an eye on your bread, especially the first time you try a new type of bread or a new air fryer.
- Flip Halfway: Even with some air fryers designed for even cooking, a flip helps guarantee uniform browning on both sides.
- Consider Your Bread: Thicker slices need more time, while thinner slices are quick to brown. Adjust accordingly.
Troubleshooting Your Air Fryer Toast
Sometimes things don’t go exactly as planned, and that’s okay! Here are some common issues and how to fix them.
- Uneven Toasting: Did you overcrowd the basket? Was it flipped? Ensure proper spacing and always flip the slices halfway through for uniform color.
- Toast is Too Dry/Hard: This often means it was cooked for too long or at too high a temperature. Try a slightly lower temperature or less time next go around.
- Toast isn’t Crispy Enough: It likely needs more time. Pop it back in for another minute or two. You might also try a slightly higher temperature if you went too low.
- Bread Flew Around: Light bread can sometimes get moved by the strong airflow. I’ve found that placing a small, air fryer-safe trivet or a piece of parchment paper (secured underneath other food, never loose) can help weigh it down, though for just toast, it’s usually not an issue unless the slices are very thin and light.
Beyond Basic Slices: Creative Air Fryer Toast Ideas
Once you’ve mastered the basic air fryer toast, a whole world of possibilities opens up. The air fryer is fantastic for taking your toast from simple to sensational. Here are a couple of ideas.
Open-Faced Toast Wonders
Think of avocado toast, but air-fried! Toast your bread as usual for 2-3 minutes, then add your toppings—sliced avocado, a sprinkle of everything bagel seasoning, or even some thinly sliced tomatoes and cheese. Pop it back in for another 1-2 minutes until the toppings are warmed and the cheese is bubbly. This creates a wonderfully warm and crisp base.
Cheesy Delights
Who doesn’t love cheese toast? Simply toast your bread for 2 minutes, then add your favorite cheese (cheddar, mozzarella, Monterey Jack). Return it to the air fryer for 2-3 minutes more, or until the cheese is melted and bubbly. It’s a fast track to a delicious, gooey treat, much like a grilled cheese but without the pan.
Safety First: Air Frying Toast Responsibly
While air frying is generally very safe, a few simple precautions can help keep your kitchen happy and your toast perfect. Safety is always important when working with hot appliances.
- Don’t Overload: This goes for safety as much as for quality. Overloading can restrict airflow, which can be a fire hazard, though rare with toast.
- Keep an Eye Out: Toasting happens fast in an air fryer. Stay nearby and check on your bread frequently to prevent burning.
- Use Appropriate Utensils: Tongs are your friends when retrieving hot toast. Avoid bare hands!
- Clean Your Air Fryer: Regularly cleaning your air fryer basket prevents accumulated crumbs and grease from becoming an issue, which could smoke or even cause a small fire. Many guidelines point to keeping heating elements clear (Cleveland Clinic).
- No Loose Parchment Paper: If you use parchment paper, ensure it’s weighed down by the food. Loose parchment paper can fly up into the heating element and pose a fire risk.
Conclusion
So there you have it – toasting bread in an air fryer is not only possible but also a remarkably efficient and effective way to achieve perfectly crispy results. From what I’ve observed, it offers a consistent golden-brown finish that rivals, and sometimes surpasses, traditional methods. It’s a great trick to have up your sleeve, whether your toaster is on vacation or you simply want to try something new.
Next time you’re craving that satisfying crunch, don’t hesitate to pull out your air fryer. With a little preheating, careful placement, and a watchful eye, you’ll be enjoying delicious, homemade toast in just minutes. Happy toasting!
Can you put aluminum foil in an air fryer with bread?
Yes, you can generally use aluminum foil in an air fryer, including when toasting bread. It can help prevent crumbs from falling through the basket or make cleanup easier. Just be sure to tuck the foil securely around your bread or under other items so it doesn’t fly up and touch the heating element. Also, never let the foil block too much airflow.
How do I stop bread from flying around in the air fryer?
Light bread slices can sometimes get pushed around by the air fryer’s powerful fan. To prevent this, you can place a small, air fryer-safe metal trivet or a heat-safe metal rack on top of the bread. Some people also suggest using a metal skewer across the top to gently hold it down. For very light bread, a simple solution is to pre-toast it for a minute or two until it’s slightly firm, then flip and continue.
Is it better to toast bread in an air fryer or a toaster?
Both methods are effective, and the “better” choice often comes down to personal preference and convenience. A dedicated toaster is typically faster for single slices. However, an air fryer offers more versatility, can toast larger or irregularly shaped bread (like bagels or thick-cut sourdough), and often yields a very even, crisp texture. If you don’t have a toaster or need to make several things at once, the air fryer can be a fantastic option.
How do you make garlic bread in an air fryer?
To make garlic bread, you can spread butter mixed with minced garlic and herbs onto one side of your bread slices. Place them butter-side up in the preheated air fryer at 350°F (175°C) for about 3-5 minutes, or until the edges are golden and the butter is bubbly and fragrant. If you want it extra crispy, you can flip it for the last minute.
Can I toast frozen bread in an air fryer?
Absolutely! You can toast frozen bread directly in your air fryer. You might just need to add an extra 1-2 minutes to the typical toasting time. Start with 4-6 minutes at 350-375°F (175-190°C), flipping halfway, and check for your desired level of crispness. It’s a quick and convenient way to get warm toast from the freezer.