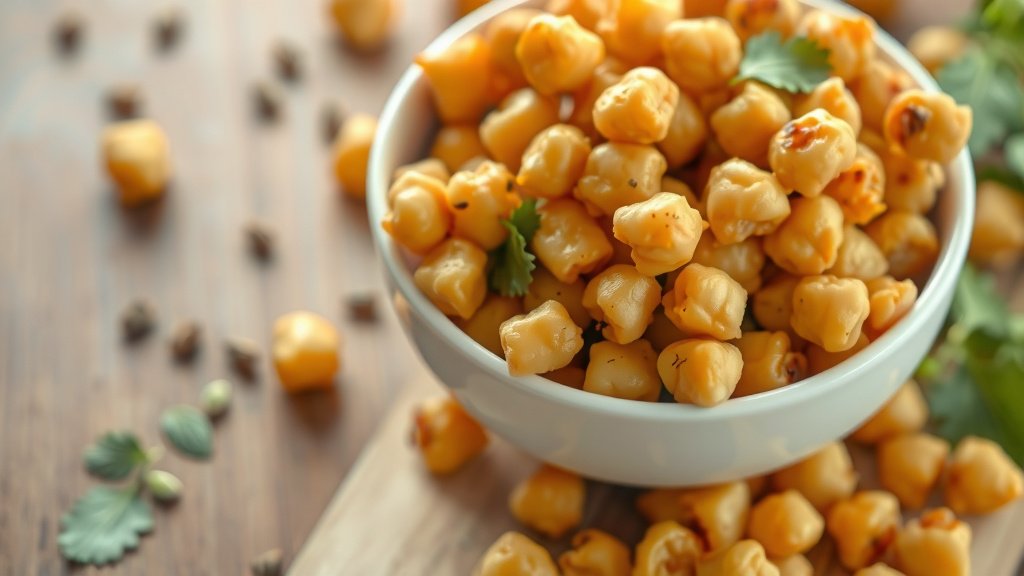
How To Make Air Fryer Crispy Chickpeas?
To make crispy chickpeas in an air fryer, drain and rinse a can of chickpeas thoroughly, then pat them completely dry before tossing with a bit of oil and your favorite seasonings.
Air frying at around 375°F (190°C) for 15-20 minutes, shaking the basket occasionally, will yield perfectly crunchy, golden-brown snacks or salad toppers.
- TL;DR:
- Start with thoroughly dried canned chickpeas for the best crispiness.
- Toss them lightly with a small amount of oil and your preferred spices.
- Air fry at a medium-high temperature, shaking the basket often for even cooking.
- Expect a golden, crunchy texture in under 20 minutes, perfect for snacking.
- Cool completely for maximum crispness, then store them properly.
How To Make Air Fryer Crispy Chickpeas?
Making crispy chickpeas in your air fryer is a quick, easy way to create a healthy snack or a crunchy addition to meals.
You can transform simple canned chickpeas into a delicious, satisfying bite with minimal effort.
Why Air Fry Chickpeas? The Crispy Revolution
Air frying offers a fantastic way to get that deep-fried crispness without all the oil.
It circulates hot air around the food, cooking it evenly and creating a delightful crunch.
For chickpeas, this means a much lighter, healthier outcome than traditional deep-frying.
The Health Perks of Chickpeas
Chickpeas, also known as garbanzo beans, are tiny powerhouses of nutrition.
They are packed with fiber, protein, and essential minerals like iron and folate (NIH).
Adding them to your diet supports digestion and can help you feel full longer.
Gather Your Ingredients: What You’ll Need
The beauty of crispy chickpeas is their simplicity. You likely have most items already.
You’ll need one can of chickpeas, a little oil, and your chosen seasonings.
- Your Essential Air Fryer Chickpea Checklist:
- One 15-ounce can of chickpeas (garbanzo beans)
- 1-2 teaspoons olive oil or avocado oil
- 1/2 teaspoon salt (or to taste)
- Your choice of seasonings (paprika, garlic powder, cumin, chili powder, etc.)
- An air fryer
Step-by-Step Guide to Crispy Perfection
Let’s walk through the process together. It’s simpler than you might think.
Following these steps ensures you get that perfectly crunchy texture every time.
Step 1: The All-Important Drain and Rinse
First, open your can of chickpeas. Pour them into a colander in your sink.
Rinse them very well under cold running water until no more foam appears.
This removes the canning liquid, called aquafaba, which can affect crispiness.
Step 2: Drying is Key for Maximum Crunch
This is perhaps the most crucial step for truly crispy chickpeas.
Spread the rinsed chickpeas onto a clean kitchen towel or several layers of paper towels.
Pat them thoroughly dry. You want them as dry as possible; moisture prevents crisping.
Some experts even suggest letting them air dry for 10-15 minutes after patting (Food Network).
Step 3: A Light Coating of Oil
Transfer your dried chickpeas to a medium bowl.
Drizzle them with 1-2 teaspoons of olive oil or avocado oil.
Toss gently to ensure every chickpea has a light, even coating.
Too much oil can make them greasy, so use sparingly.
Step 4: Seasoning for Flavor Power
Now for the fun part: adding flavor. This is where you can get creative.
Toss your oil-coated chickpeas with your chosen seasonings until they are well coated.
We found that adding salt at this stage helps the flavors really stick.
| Flavor Profile | Seasoning Ideas |
|---|---|
| Classic Savory | Garlic powder, onion powder, salt, black pepper |
| Spicy Kick | Chili powder, cayenne pepper, cumin, salt |
| Smoky BBQ | Smoked paprika, brown sugar, garlic powder, salt |
| Sweet & Cinnamon | Cinnamon, a pinch of sugar, nutmeg (add after cooking for best results) |
Step 5: Air Frying for Crispness
Preheat your air fryer to 375°F (190°C) for 3-5 minutes, if your model requires it.
Spread the seasoned chickpeas in a single layer in the air fryer basket.
Avoid overcrowding the basket, as this can steam them instead of crisping.
Step 6: Shake and Bake (or Fry!)
Air fry for 15-20 minutes, shaking the basket every 5-7 minutes.
This ensures even cooking and prevents burning on one side.
You’ll notice them getting darker and sounding harder as you shake them.
Step 7: Check for Doneness and Cool
Your chickpeas are ready when they are golden brown, crunchy, and firm to the bite.
Carefully remove them from the air fryer and let them cool completely on a plate.
Many experts say cooling helps them reach their maximum crispiness.
Troubleshooting Common Air Fryer Chickpea Issues
Sometimes, things don’t go perfectly. Let’s fix those common problems.
Don’t worry, even experienced cooks run into snags now and then.
“My Chickpeas Aren’t Crispy Enough!”
This is usually due to residual moisture. Did you dry them well?
Another reason might be overcrowding; try cooking in smaller batches.
You can always pop them back in for another 2-3 minutes if they need more crunch.
“They’re Burning Before They Get Crispy!”
Your air fryer might be running a bit hot, or the pieces are unevenly spread.
Reduce the temperature slightly, maybe to 360°F (180°C), and shake more often.
Keep a close eye on them, especially towards the end of cooking.
Storage Tips for Your Crispy Chickpeas
Once cooled, store your crispy chickpeas in an airtight container.
We found that they stay best at room temperature for up to 3-4 days.
Avoid refrigerating, as this can make them lose their crunch.
Conclusion
Creating delicious, crispy chickpeas in your air fryer is a simple, rewarding cooking project.
With just a few steps like thorough drying and proper seasoning, you can achieve a satisfying snack or meal enhancement.
This method offers a healthier, quick alternative to deep-frying, proving that healthy eating can also be incredibly tasty.
How do I make my chickpeas extra crispy?
The most important step for extra crispy chickpeas is to ensure they are absolutely dry before adding oil and seasonings. Pat them vigorously with a kitchen towel, or even let them air dry for a few minutes. Also, avoid overcrowding your air fryer basket so air can circulate freely around each chickpea.
Can I use fresh chickpeas instead of canned ones?
While canned chickpeas are much more convenient for this recipe, you can use fresh or dried chickpeas. You would need to soak and cook them until tender first, then follow the same drying, seasoning, and air frying steps. The goal is always to start with fully cooked and completely dry chickpeas.
What are some unusual seasoning ideas for air fryer chickpeas?
Get adventurous with seasonings! Try a “Ranch” blend with dried dill, parsley, onion powder, and garlic powder. For a sweet and savory mix, combine maple syrup (add after cooking) with smoked paprika and a touch of salt. Another idea is a “Everything Bagel” seasoning blend for a unique twist.
How can I reheat crispy chickpeas to make them crunchy again?
If your crispy chickpeas have softened over time, you can easily revive their crunch. Simply preheat your air fryer to 350°F (175°C) and air fry them for 3-5 minutes, shaking halfway through. Keep a close watch to prevent burning, and they’ll be crispy once more.
Are air fryer crispy chickpeas good for meal prep?
Yes, air fryer crispy chickpeas are excellent for meal prep! They can be made ahead and added to salads, grain bowls, wraps, or eaten as a healthy snack throughout the week. Just remember to store them in an airtight container at room temperature to maintain their crispiness for 3-4 days.