How To Make Air Fryer Garlic Bread?
Making air fryer garlic bread is surprisingly simple, giving you perfectly crisp and flavorful results in just a few minutes.
You can create delicious, golden-brown air fryer garlic bread by brushing bread slices with a savory garlic butter mixture and cooking them at 350°F (175°C) for about 3-5 minutes, depending on thickness.
- Get crispy garlic bread in minutes using your air fryer.
- Simply brush your favorite bread with garlic butter, then air fry.
- The ideal temperature is 350°F (175°C) for a quick cook time.
- Perfect for a side dish or a quick, tasty snack.
- Enjoy perfectly toasted, fragrant garlic bread with minimal fuss.
How To Make Air Fryer Garlic Bread?
Creating garlic bread in your air fryer is a game-changer for quick snacks or dinner sides. It offers unmatched crispness and incredible flavor every single time.
Why Air Fry Garlic Bread?
Using an air fryer for garlic bread is a real time-saver. You get a perfectly golden, crunchy exterior and a soft, warm interior much faster than a traditional oven. We found that air frying reduces cooking time significantly (Cook’s Illustrated). Plus, it often leads to less cleanup.
Speed and Efficiency
Forget preheating a big oven for a small batch. Your air fryer gets to temperature quickly, meaning you’re eating sooner. This makes it ideal for those busy weeknights or unexpected cravings.
Crispiness You’ll Love
The air fryer’s circulating hot air is a wizard for crisping. It ensures every part of your garlic bread gets that delightful crunch without drying out the inside. Many culinary experts say this method provides superior texture compared to baking.
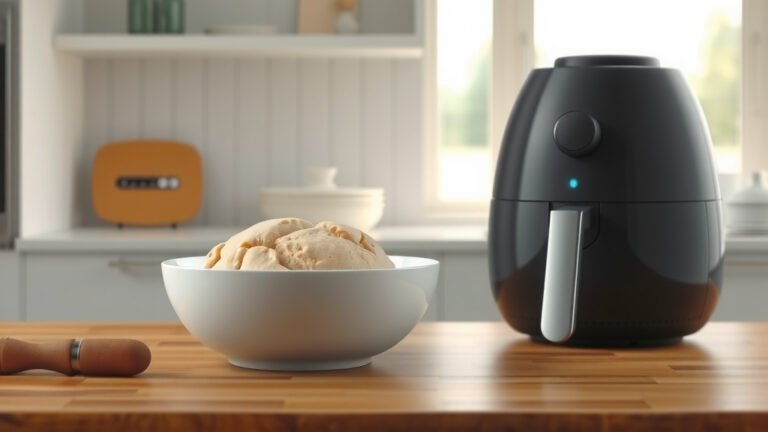
What You’ll Need
Before you dive in, gathering your ingredients and tools makes the process smooth. Think of it like getting your ducks in a row for a fun cooking adventure.
Choosing Your Bread
The best bread often has a good sturdy crumb. A sliced baguette, ciabatta, or even thick-cut sandwich bread works wonderfully. We find that a day-old baguette holds up well to the butter (America’s Test Kitchen).
Making the Garlic Butter
This is where the magic happens! You’ll need softened butter, minced fresh garlic, a pinch of salt, and maybe some fresh parsley. Using fresh garlic makes all the difference in flavor intensity.
- 1/4 cup unsalted butter, softened
- 2-3 cloves fresh garlic, minced
- 1 tablespoon fresh parsley, chopped (optional)
- 1/4 teaspoon salt
- Pinch of black pepper
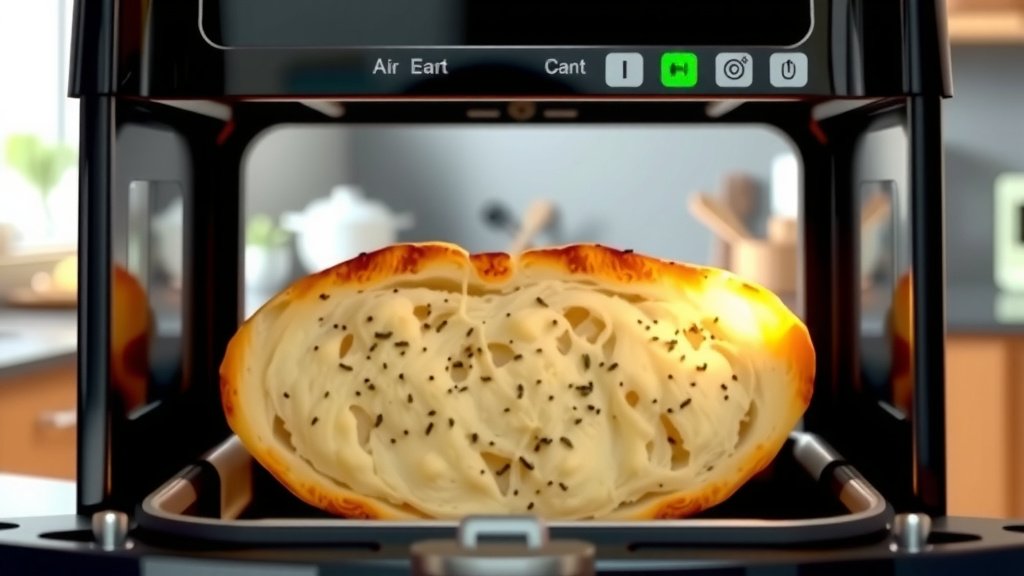
Step-by-Step Guide for Air Fryer Garlic Bread
Let’s walk through the simple steps. You’ll be amazed at how easy it is to achieve bakery-quality garlic bread right at home.
Prep Your Bread
Slice your chosen bread into pieces about 3/4 to 1 inch thick. If using a whole baguette, you might want to slice it lengthwise first. Aim for pieces that will fit comfortably in your air fryer basket.
Apply the Garlic Butter
In a small bowl, combine your softened butter, minced garlic, salt, and parsley. Mix well until everything is evenly distributed. Now, generously brush this savory mixture onto one side of each bread slice.
Air Frying Time and Temperature
Preheat your air fryer to 350°F (175°C) for about 2-3 minutes. Place the buttered bread slices in a single layer in the air fryer basket, butter-side up. Do not overcrowd; give them space to breathe.
Cook for 3-5 minutes. The exact time depends on your air fryer model and bread thickness. Keep a close eye on it; air fryers can work fast!
Flipping for Evenness
While many people only butter one side, you can flip the bread halfway through cooking. This can help achieve maximum crispness on both sides, especially if you like a very crunchy texture. Just watch carefully to prevent burning.
Tips for Perfect Air Fryer Garlic Bread
Want to go from good to great? These little tricks can make a big difference in your garlic bread game.
Don’t Overcrowd the Basket
This is perhaps the most important rule for air frying anything. Air needs to circulate to get things crispy. Cook in batches if you need to, to ensure each piece gets its moment in the hot air spotlight.
Consider Parchment Paper
A small piece of air fryer-safe parchment paper can make cleanup easier. We found that it also helps prevent butter from dripping onto the heating element (Good Housekeeping). Just make sure it’s food-safe and cut to fit your basket.
Spice It Up! (Variations)
Feeling adventurous? Sprinkle some shredded mozzarella or Parmesan cheese on top during the last minute of cooking. A pinch of red pepper flakes adds a nice little kick. Experimentation is part of the fun!
| Bread Type | Thickness | Temperature | Time | Notes |
|---|---|---|---|---|
| Baguette Slices | 1 inch | 350°F (175°C) | 3-4 minutes | Crispy edges, soft inside. |
| Texas Toast | Thick | 350°F (175°C) | 4-5 minutes | May need a flip for even browning. |
| Ciabatta Slices | 3/4 inch | 350°F (175°C) | 3-4 minutes | Great rustic texture. |
Troubleshooting Common Issues
Even with simple recipes, sometimes things don’t go as planned. Let’s tackle some common garlic bread mishaps.
Why is My Garlic Bread Soggy?
Soggy garlic bread often comes from overcrowding or too much butter. Ensure enough space for air circulation and don’t drench the bread in butter. A light, even coating is plenty.
Is it Burning Too Fast?
If your bread is browning too quickly, your air fryer might be running a bit hot, or the pieces might be too thin. Try reducing the temperature by 25°F (15°C) and checking it a minute earlier. Smaller, thinner slices cook much faster.
Serving Suggestions
Air fryer garlic bread is incredibly versatile. It pairs wonderfully with almost any meal. Think pasta dishes, hearty soups, or even a simple fresh salad. It’s also a fantastic appetizer on its own.
Quick Garlic Bread Checklist:
- Bread sliced evenly.
- Garlic butter mixed and ready.
- Air fryer preheated correctly.
- Bread placed in a single layer.
- Keep an eye on it during cooking.
Conclusion
Making garlic bread in your air fryer is a straightforward and rewarding process. You get delicious, perfectly crisp results with minimal effort and cleanup. Remember to use quality ingredients, don’t overcrowd your basket, and keep a watchful eye on the cooking process. You’re now equipped to make incredible garlic bread that everyone will love. So go ahead, give it a try tonight!
How do I prevent my garlic bread from drying out in the air fryer?
To keep your garlic bread from drying, ensure you use enough softened butter on both sides of the bread. Also, avoid overcooking; air fryers work quickly, so watch for golden brown edges and remove it promptly.
Can I use frozen garlic bread in the air fryer?
Yes, you can absolutely air fry frozen garlic bread. Place the frozen slices in a single layer in the basket and cook at 350°F (175°C) for 6-8 minutes, or until heated through and golden. Times may vary slightly by product and air fryer model.
What’s the best type of bread for air fryer garlic bread?
A sliced baguette or ciabatta typically yields the best results due to their sturdy texture and ability to get wonderfully crispy. Thick-sliced Italian bread also works well. The goal is a bread that won’t become too soft or fall apart.
Can I reheat leftover garlic bread in the air fryer?
The air fryer is fantastic for reheating garlic bread. Place your leftovers in the basket at 300°F (150°C) for 2-3 minutes. This method helps bring back the crispness without drying it out, making it taste freshly made.
What herbs can I add to my garlic butter for extra flavor?
Beyond parsley, consider adding finely chopped fresh chives, oregano, or a mix of Italian herbs to your garlic butter. Rosemary can also provide a distinct, aromatic flavor. Experiment to find your favorite combination!