Can You Use An Air Fryer To Proof Dough?
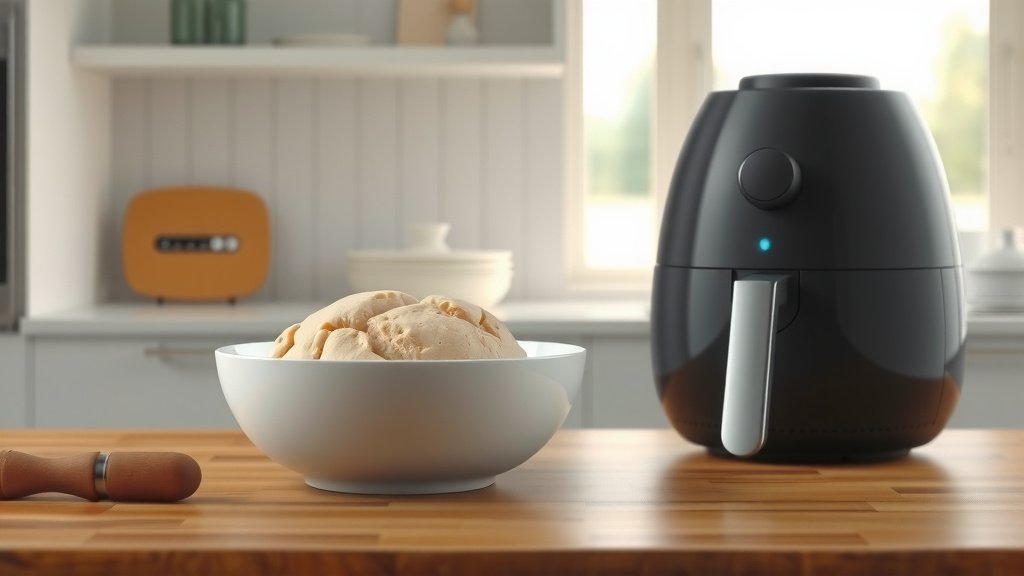
Yes, you can technically use an air fryer to proof dough, but it often comes with significant challenges due to its primary design for high, dry heat. Achieving the ideal warm, humid environment for yeast activation can be tricky, making it a less than optimal choice for consistent results.
While possible, experts generally advise against relying on an air fryer for dough proofing unless you’re very careful with temperature control and moisture, as it can easily overproof or dry out your dough.
TL;DR:
- Proofing dough in an air fryer is generally not recommended due to inconsistent heat and lack of humidity.
- Air fryers are designed for crispy results, not the gentle warmth dough needs to rise properly.
- You risk drying out or cooking your dough if the temperature isn’t perfectly controlled.
- Better, more reliable methods exist for proofing dough, such as using a warm oven or microwave.
- If you try it, use the lowest possible temperature and add a bowl of water for humidity.
Can You Use An Air Fryer To Proof Dough?
You can certainly try to use your air fryer for proofing dough, but it’s important to know the potential pitfalls. It’s not the easiest method to get a perfectly risen dough, largely because air fryers are built for powerful, circulating heat.
Many home bakers find it hard to create the consistent, gentle warmth yeast needs without drying out the dough or accidentally starting to bake it.
Why Proofing Dough Matters So Much
Proofing is the magic step where yeast goes to work, converting sugars into carbon dioxide. This process creates those wonderful air pockets, making your bread light and airy.
If your dough doesn’t proof correctly, your final product can be dense, tough, or just not what you hoped for. It’s a vital stage for texture and flavor development.
Think of it like nurturing a plant; it needs just the right environment to flourish. Dough is very similar in its need for ideal conditions.
Understanding Your Air Fryer’s Heat
Air fryers operate by circulating very hot air, similar to a convection oven but often more intense and concentrated. This design is fantastic for making food crispy and cooked evenly on the outside.
However, that same powerful airflow and high heat can be a disadvantage when you’re aiming for a gentle, warm proofing environment. It’s a bit like trying to whisper in a wind tunnel.
The Challenge of Consistent Low Heat
One of the biggest hurdles is maintaining a consistently low temperature. Many air fryers have minimum temperature settings that are still a bit too high for ideal dough proofing.
Yeast thrives around 75-85°F (24-30°C). If your air fryer’s lowest setting is, say, 150°F (65°C), you’re already starting too hot. This can kill the yeast or cause your dough to overproof too quickly.
Hot Spots and Uneven Proofing
Because of the way air circulates, air fryers can create hot spots. This means one part of your dough might be warm and happy, while another part is getting too much direct heat.
This uneven heating can lead to an inconsistent rise, where parts of your dough are perfectly proofed and others are either under-proofed or beginning to cook. It’s tough to get an even result.
How Air Fryers Compare to Traditional Proofing
Let’s look at how an air fryer stacks up against more conventional methods for dough proofing. You’ll quickly see why traditional ways are often preferred.
| Method | Temperature Control | Humidity Control | Risk Factors | Overall Suitability for Proofing |
|---|---|---|---|---|
| Air Fryer | Challenging (often too high, inconsistent) | Poor (very dry environment) | Drying out, over-proofing, killing yeast, uneven rise | Low |
| Oven (turned off with light on) | Good (gentle warmth) | Medium (can add water bowl) | Accidental baking if oven turns on | Medium to High |
| Microwave (with hot water) | Good (retains warmth) | Good (steam from water) | None (oven is off) | High |
| Warm room/countertop | Variable (depends on room temp) | Good (cover dough) | Slow proofing if too cool | Medium |
Trying to Proof Dough in an Air Fryer: A Step-by-Step Guide (with Cautions!)
If you’re still keen on trying this method, here’s a cautious approach. Remember, the goal is warm and humid, not hot and dry.
- Use a separate, oven-safe bowl for your dough: Don’t put the dough directly in the air fryer basket.
- Add a small oven-safe bowl of water: Place this in the air fryer alongside your dough for humidity.
- Set the absolute lowest temperature: Many experts say this means no more than 100°F (38°C), if your air fryer even goes that low.
- Run for very short bursts: Turn the air fryer on for 1-2 minutes, then turn it off completely.
- Monitor constantly: Check your dough every 5-10 minutes to prevent over-proofing or drying.
- Cover your dough: Use plastic wrap or a damp cloth to help retain moisture.
Prepping Your Air Fryer for Proofing
First, make sure your air fryer basket is clean. Place your dough in an oven-safe bowl, lightly oiled and covered loosely with plastic wrap or a damp cloth. This covering is critical to prevent a crust from forming.
Next, find a small, oven-safe dish or ramekin to fill with about half a cup of water. This will help create some much-needed steam and moisture inside the air fryer cavity.
Setting the Right Temperature and Time
This is where it gets tricky. Set your air fryer to the lowest possible temperature. Some models have a “warm” setting, which might be around 120-150°F (49-65°C).
Even this can be too hot for yeast. We found that some people only turn the air fryer on for a minute or two, then turn it off completely, letting the residual warmth do the work (Mayo Clinic).
Monitoring Your Dough Carefully
You absolutely must stay with your dough during this process. Open the air fryer every 5-10 minutes to check its progress and feel the temperature inside.
If it feels too warm, simply leave it off for a bit longer. Look for the dough to double in size, not just expand. A good finger test will show if it’s ready.
Best Practices for Air Fryer Dough Proofing (If You Must!)
If you’re determined to use your air fryer, try these methods to boost your chances of success. They aim to replicate a more controlled environment.
Using a Proofing Box Method
While not a true proofing box, you can create a similar effect. Place your covered dough bowl and the water bowl into the air fryer. Only turn on the air fryer for 60 seconds at its lowest setting.
Then, turn it off and let the residual heat work its magic. We found this “on for a bit, off for a while” approach is less likely to damage the yeast.
The Water Bath Trick
This technique is mostly about adding humidity. By placing a small bowl of hot, almost boiling water next to your dough, you create a steamy microclimate.
You might not even need to turn on the air fryer at all. Just the warmth from the hot water, contained within the air fryer’s insulated space, might be enough. Close the air fryer door and let it sit.
Better Alternatives for Proofing Dough
Honestly, there are many simpler, more reliable ways to proof dough that don’t involve wrestling with an air fryer’s heat settings.
- The “Oven with Light On” Method: Turn your oven light on, place your covered dough inside, and close the door. The light generates just enough gentle warmth.
- The Microwave Method: Boil a cup of water in your microwave for a minute or two. Remove the water, then immediately place your covered dough in the warm, steamy microwave. Keep the door closed.
- Warm Spot in Your Kitchen: Place your covered dough near a sunny window (not in direct sun), on top of your fridge, or anywhere that feels comfortably warm.
- Dedicated Proofing Box: If you bake often, a small, inexpensive proofing box offers perfect temperature and humidity control. Many experts say this is the gold standard for consistent results (King Arthur Baking).
- On a Heating Pad: If you have a heating pad, set it to low, place a towel over it, and put your covered dough bowl on top.
Conclusion
So, can you use an air fryer to proof dough? Yes, you can, but it’s like using a race car for a leisurely Sunday drive – possible, but not ideal and needs a lot of careful handling. Air fryers are designed for quick, intense heat, which is the opposite of what delicate yeast dough needs to rise beautifully.
While you might achieve some success with very strict temperature monitoring and added humidity, many experts agree that alternative methods are far more reliable and stress-free. For consistently light, airy bread, sticking to traditional proofing environments will save you time, frustration, and potentially wasted ingredients.
Can an air fryer kill yeast during proofing?
Yes, an air fryer can definitely kill yeast if the temperature inside gets too high. Yeast thrives in warmth, but extreme heat, generally above 130°F (54°C), will destroy the yeast cells, preventing your dough from rising.
How do I add humidity to an air fryer for dough proofing?
To add humidity, place a small, oven-safe bowl filled with water alongside your covered dough in the air fryer. The heat will cause the water to evaporate, creating steam, which is essential for a good proof.
What is the ideal temperature for proofing dough?
The ideal temperature for proofing dough is generally between 75-85°F (24-30°C). This range encourages yeast activity without being so hot that it speeds up the process too much or harms the yeast.
How long does dough usually take to proof?
Dough typically takes anywhere from 45 minutes to 2 hours to proof, depending on the recipe, room temperature, and type of yeast. When proofing, you’re looking for the dough to approximately double in size.
What are the signs of over-proofed dough?
Over-proofed dough will often look overly puffy and may have a sour, yeasty smell. When you poke it, it might deflate quickly or completely collapse, indicating that the gluten structure has weakened too much.